You can do it with Easifix

Repairing walls, plasterboard and textured ceilings with Easifix Kits
Want to smooth over damage to ceilings and walls or need a quick fix on holes in plasterboard? Now is your chance for a fresh start and a smooth ceiling with the help of Easifix Wall Repair Kit and Easifix Texture Repair Kit. We’ve all been there – damaged walls, especially to plasterboard, can be a common occurrence, but the good news is that it’s relatively swift to repair these with two hassle-free options. Even better, you’ll find everything in one magic box full of the equipment you need for a swift resolution.
EasiFix Wall Repair Kit
Faced with holes in plastered walls and plasterboard, this neat kit has everything to help you repair the job with ease. Inside you’ll find enough to cover an area approximately of 4m² which will be plenty enough for at least one hole.
What’s inside the kit?
In short, everything you need!
-
2 x 500g of multipurpose filler
-
1 plasterboard patch in size: 150mm x 150mm
-
Sanding block
-
Filling knife
-
Mixing tool
-
Mixing bucket

Quick guide: How to use the Easifix Wall Repair Kit

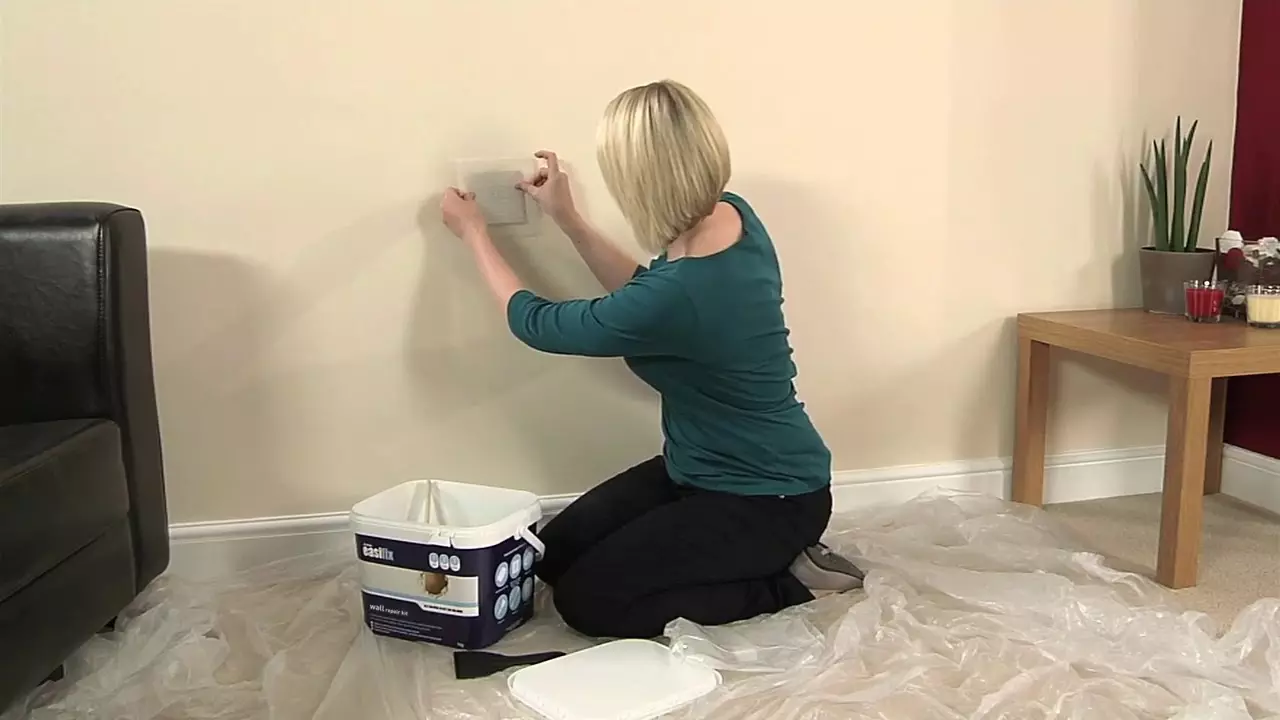
We all know the saying, ‘failing to prepare is preparing to fail’. Well, the prepping stages are necessary so always ensure the damaged area is clean, dry, and free from dirt, dust, and loose material.

Using the mixing bucket, add 1 x 500g sachet of the filler to 325ml of clean water and stir continuously with the mixing tool until you reach a smooth paste. Leave to stand for five minutes, allowing any undissolved powder to be absorbed. Finally, re-stir to a creamy consistency.

If you’d like to fill holes in plaster or plasterboard, simply remove the paper backing from the self-adhesive patch and apply over the hole with firm pressure. Apply a generous amount of filler over the patch, pushing it through the holes. Then, working from the centre, feather out at least 50mm beyond the patch edge. Allow to dry for at least one hour. For general filling: You can fill in holes and cracks with the filling knife. Don’t forget to clean the tools and buckets with soapy water immediately after use.
Top tip: The mixture can be used for 45 minutes and setting time is 70-90 minutes, depending on atmospheric conditions. Lightly sponge the wet edges to reduce the amount of sanding needed.

Finally, it’s time to get painting but do ensure the area is fully dry before using the sanding block included to lightly sand to remove imperfections. Choose a good quality emulsion to match the existing surface colour.
Always follow the paint manufacturer’s instructions for porous surfaces.
EasiFix Texture Repair Kit
Next up, when it comes to repairing damage to existing walls, this is the kit for you. It contains everything you need to get the job done easily.
The kit is sufficient to repair 1.8 - 3m² depending on texture design and thickness.
What’s inside the kit?
In short, everything you need!
- Texture 1.5kg
- Texturing brush
- Mixing tool
- Mixing bucket
- Mixing bucket

Quick guide: How to use the EasiFix Texture Repair Kit

Don’t forget that the prepping stages are a must so always ensure the damaged area is clean, dry, and free from dirt, dust, and loose material. For gloss surfaces, lightly sand to provide a key. Using a damp sponge, remove the dust and allow to dry.

Using the mixing bucket, add 1.5kg of texture to 750ml of clean water and mix to a thick paste consistency. Leave to stand for 10 minutes before re-mixing to a smooth paste. This consistency is perfect for filling small cracks and repairing damage to joints.
If you’re faced with broken leather or swirl patterns, stir in an additional 100ml of water; for stipple patterns add up to 200ml.

Apply a generous, even coat of texture and then use the texturing brush to create the appropriate pattern. Blend into the surrounding area to match the existing pattern. Don’t forget to clean the tools and buckets with soapy water immediately after use.
Top tip: Allow to dry for a minimum of 24 hours ensuring that the room temperature remains above 5°c, and once the work has been completed ensure the room is well-ventilated as this will help the area to dry quicker.
To match the existing surface colour, make sure the texture has dried, then seal the area before painting with a good-quality emulsion. Always follow the paint manufacturer’s instructions for porous surfaces.
Easifix Repair Kit tubs are now made from at least 30% recycled plastic. Their lids are made from 100% recycled plastic. Look out for our eco stamp on new tubs you buy in 2022.
